A roof covered in moss can appear unappealing and potentially cause significant damage if left unattended. Over time, it traps moisture, lifts shingles, and can shorten your roof’s lifespan. If you have noticed moss on your roof, it is essential to take action before it develops into a larger problem.
In this article, as a trusted roofing contractor in Bronx, we’ll explain how to remove moss from roof safely and effectively. With practical tips from our experience, you can restore your roof’s appearance and protect your home from damage.
The Benefits of Removing Moss From Your Roof
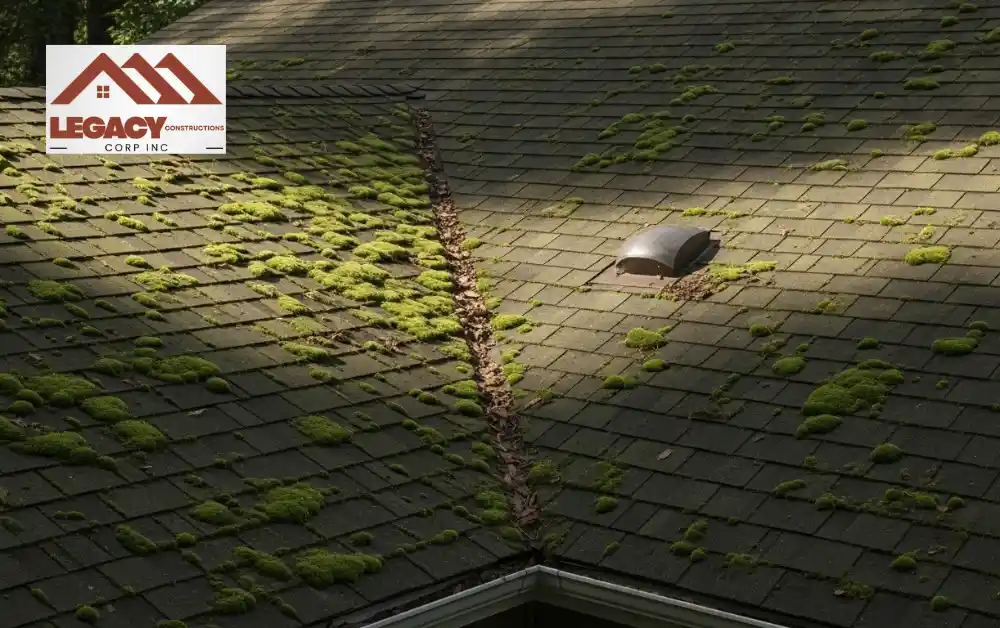
Moss loves damp, shady spots, and your roof can be the perfect place for it to grow. But moss on the roof is more than just a cosmetic issue. It can lift shingles, trap water, and even cause leaks. During winter, ice can form under the moss, making the damage worse.
Cleaning moss from the roof regularly is a simple maintenance step that protects your home and saves money in the long run. Removing moss helps your roof last longer, improves drainage, and keeps your home looking its best. Plus, a moss-free roof reduces the risk of costly repairs and structural problems down the line.
Spotting Moss on Your Roof: What to Look For
Before you start removing moss from the roof, it helps to know the warning signs. Moss usually grows in damp, shaded areas, so check those spots carefully.
Look for:
- Green patches spreading across shingles or shaded sections of the roof
- Black streaks or darkened areas that don’t wash away with rain
- Shingles that appear loose, curling, or damaged
If you notice any of these signs, it’s time to take action and start cleaning moss from roof. Catching it early makes the job easier and helps prevent more serious damage down the line.
Roof Safety Tips Before Removing Moss
Working on a roof can be dangerous, so it’s important to take safety seriously before removing moss from the roof. Here are some key precautions:
- Always use a sturdy ladder and have someone nearby to assist you
- Wear slip-resistant shoes to prevent accidental slips
- Consider a safety harness if your roof is steep or difficult to walk on
Never attempt to remove moss from the roof without proper safety gear. Moss can make surfaces very slippery, and even a small misstep can lead to serious injury. Taking a few extra minutes to stay safe will make the job much easier and stress-free.
Tools You’ll Need
Before you start removing moss from the roof, it’s important to have the right tools on hand. This makes the job easier, safer, and more effective. Here’s what you’ll need:
- A soft-bristled brush or broom for gentle scrubbing
- A garden hose to rinse off moss and debris
- Moss cleaner, either a commercial product or a safe homemade solution
- Protective gloves and eyewear to stay safe while working
Avoid using wire brushes or pressure washers. Using the right tools ensures you clean your roof thoroughly without causing any harm to your roofing material.
Step-by-Step Guide to Removing Moss
Here’s a simple method for cleaning moss on the roof without causing harm:
1. Clear Debris
Start by removing leaves, branches, and dirt from your roof. Debris holds moisture, creating the perfect environment for moss to grow. A clean surface makes the next steps much easier and more effective.
2. Apply Moss Cleaner
Next, treat the moss with a solution that is safe for your shingles. You can use a commercial moss cleaner from a home improvement store, or make a simple DIY mix with water and oxygen bleach.
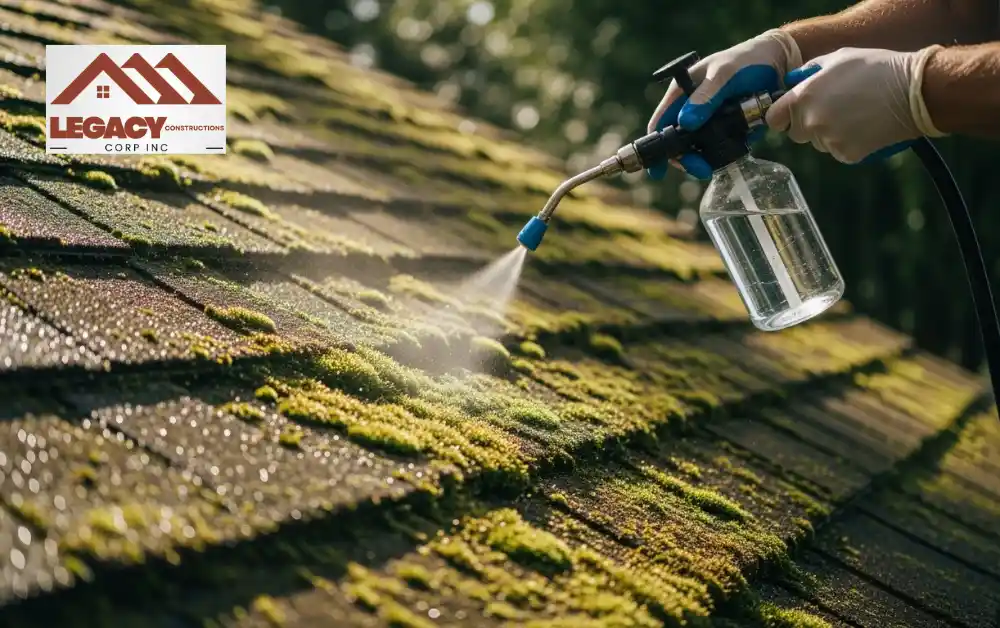
Spray the solution evenly over the affected areas and let it sit for 15 to 20 minutes. Make sure it doesn’t dry completely, as keeping the moss moist softens it and makes the next step much easier.
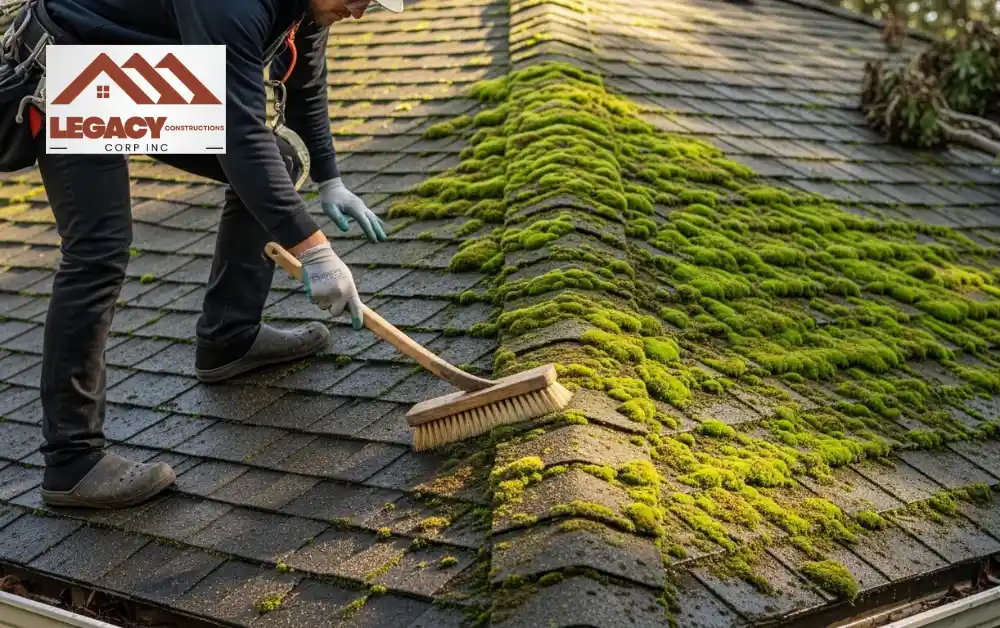
3. Scrub Gently
Use a soft-bristled brush to scrub the moss in gentle, downward motions. Always follow the slope of the roof to prevent lifting or damaging shingles. This careful approach helps remove stubborn moss patches effectively while keeping your roof intact.
4. Rinse Thoroughly
Once the moss has been loosened, use a garden hose to wash away the residue. Avoid pressure washers, as the high pressure can damage shingles. After rinsing, take a close look at your roof to check for any remaining moss and make sure it is fully cleaned.
5. Prevent Future Growth
After cleaning your roof, it’s important to take steps to prevent moss from coming back. Simple measures can keep your roof healthy for years:
- Trim overhanging tree branches to let in more sunlight and reduce shade
- Keep gutters clean to prevent moisture buildup
- Install zinc or copper strips along the roof ridge, which naturally slow moss growth
Taking these precautions helps protect your roof, reduces maintenance, and keeps it looking its best.
Common Mistakes When Removing Roof Moss
When working on a mossy roof, it’s easy to make mistakes that can cause more harm than good. Avoid these common errors:
- Using harsh chemicals that can damage shingles
- Scrubbing too hard, which may lift or break shingles
- Ignoring basic safety precautions while on the roof
By taking your time and following proper techniques, you can get a clean, moss-free roof without risking damage or costly repairs.
When Should You Hire Professionals to Remove Moss?
While many homeowners can handle small patches of moss, there are times when calling in the experts is the safer and more efficient choice. Consider hiring a professional if:
- Your roof is very steep or hard to access safely
- Moss covers a large area, and removal seems overwhelming
- You notice signs of roof damage or leaks
- You want the job done efficiently without risking your shingles
If you are in the Bronx, a trusted roofing company in Bronx offering moss removal services can handle the job safely, protect your roof, and prevent future problems, saving you time, effort, and potential repairs.
Conclusion
Dealing with moss on your roof doesn’t have to be overwhelming. By spotting the signs early, following proper safety precautions, and using the right tools, you can effectively remove moss and protect your shingles. Cleaning, scrubbing, rinsing, and taking preventive steps help extend your roof’s lifespan and keep it looking its best. For larger or hard-to-reach areas, hiring a professional is a smart choice, saving time, effort, and preventing costly repairs while ensuring your roof stays strong for years to come.
FAQs
1. Can I safely remove moss from my roof myself?
Yes, for small patches. Use a soft brush, garden hose, and moss-safe cleaner, and always follow safety precautions.
2. How often should I inspect and clean moss from my roof?
Check your roof at least once a year. Early cleaning prevents damage and extends your roof’s lifespan.
3. Can moss cause serious damage to my roof?
Yes, moss traps moisture, lifts shingles, and can cause leaks. Ice in winter can make it worse.
4. What steps can I take to prevent moss from returning?
Trim tree branches, keep gutters clean, and consider zinc or copper strips along the roof ridge.