
A small roof leak can quickly become a big problem. Water dripping into your attic can damage insulation, weaken wooden beams, and leave ugly stains on ceilings. Many homeowners think fixing a roof means climbing onto it. But often, minor issues can be handled safely from inside the loft. Learning how to repair roof felt from inside saves money and keeps you safe, especially in bad weather.
This guide will show you step by step how to identify damage, prepare your loft, and apply a roof felt repair patch. You’ll also learn common mistakes to avoid. With these tips, your felt roof repair will last longer. Whether you are a DIY homeowner or just looking to protect your attic, these steps help keep your roof strong and your home safe.
Why Roof Felt Is Important
Roof felt, also called underlayment, is a protective layer beneath shingles or tiles. Its main job is to block water. When rain or snow slips past your roof covering, the felt guides moisture away from the roof deck. Without it, water can seep into your attic. This can damage insulation, weaken beams, and even cause mold.
Over time, roof felt can wear out, tear, or develop holes due to weather, age, or shifting roof materials. Fixing damage as soon as it appears is very important. Repairing roof felt early prevents bigger problems and protects your home. A small tear left unchecked can lead to rotting timbers and costly repairs later.
Signs Your Roof Felt Needs Repair
Catching roof problems early makes roof felt repair from inside much easier. Look for these common warning signs in your loft:
- Damp insulation or water stains on beams and rafters
- Small drips or puddles form during rain
- Musty or damp smells in the attic
- Daylight shining through gaps in the roofing layers
- Loose, torn, or blistered sections of felt
If you spot any of these issues, it’s time to take action. A minor tear can often be fixed with a simple patch, but ignoring it may lead to bigger, more expensive repairs. Early detection keeps your felt roof repair simpler and more effective.
Tools and Materials You’ll Need
Using the right tools makes any felt roof repair much easier and more effective. For most minor repairs, you’ll need just a few simple items:
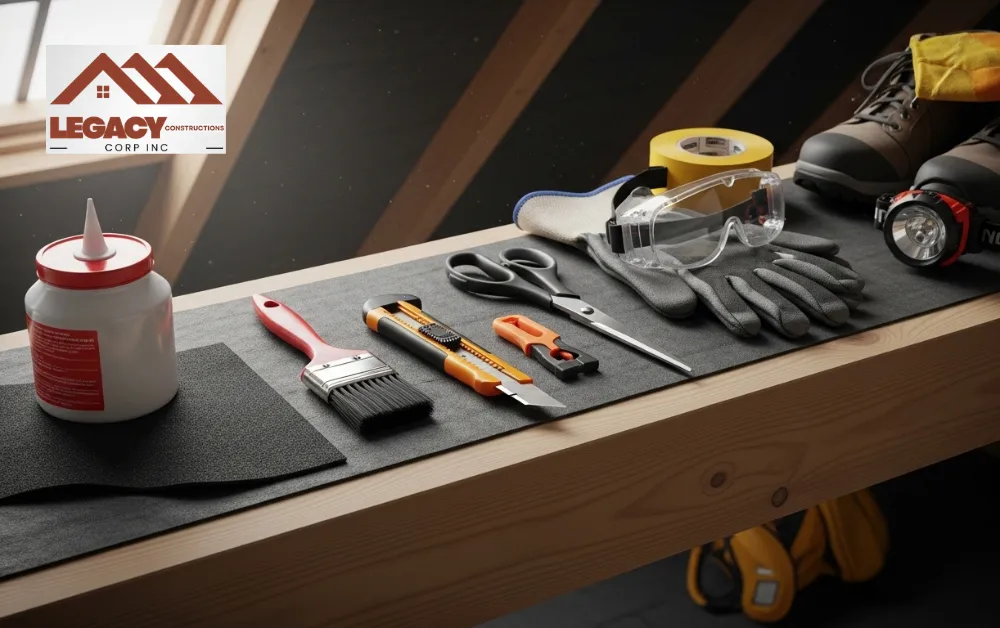
- Roofing adhesive or bitumen glue for sealing patches
- A utility knife or scissors to cut your patch
- A roof felt repair patch or strong felt material
- Roofing tape for small cracks (optional)
- Gloves, eye protection, and sturdy shoes for safety
- A flashlight or headlamp to see clearly in your loft
- A small brush to clean dust and debris
With these materials ready, you can handle most minor repairs yourself. Having the right tools ensures your roof repair from the inside is smooth, safe, and long-lasting.
Step-by-Step Guide: How to Repair Roof Felt from Inside
1. Locate the Damage
Enter your loft and examine the underside of the roof. The felt layer is usually black or gray. Look for tears, holes, or areas where the felt has separated. After rain, water marks on insulation or timbers often indicate the source of leaks. Trace the wet area to its highest point and mark it with chalk or tape.
2. Dry and Clean the Area
Moisture prevents adhesives from sticking. If the damaged felt is damp, allow it to dry completely. Then, remove dust, cobwebs, or loose fragments with a soft brush or cloth. A clean surface ensures your patch bonds properly, which is key to a long-lasting felt roof patch repair.
3. Cut and Fit the Patch
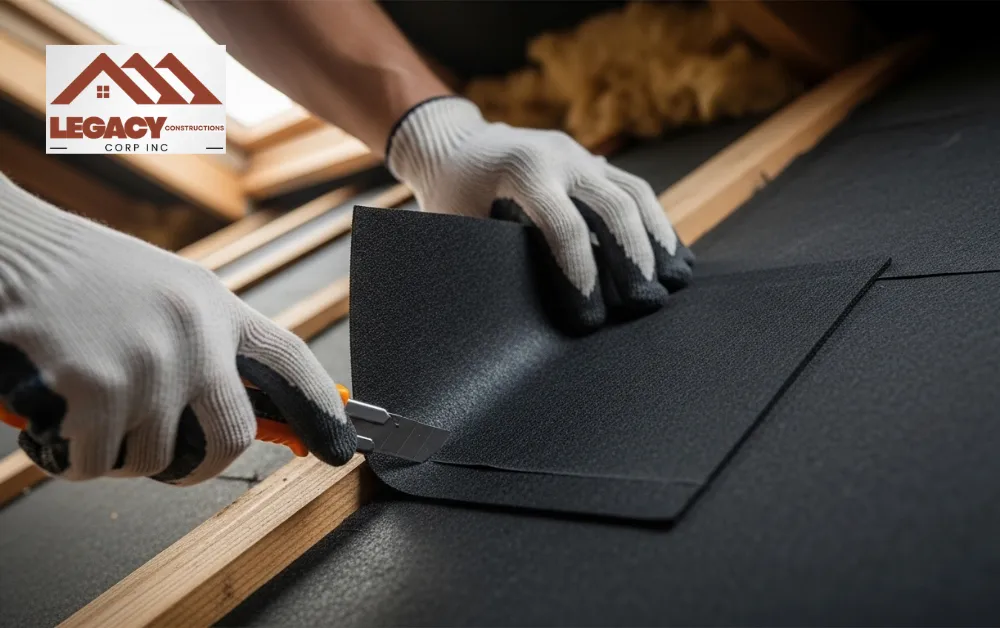
Measure the damaged area and cut a piece of roofing felt or patch material at least 2–3 inches larger than the tear on all sides. Overlapping the edges helps create a strong, waterproof seal. Use a sharp utility knife for clean, straight edges. A properly sized patch prevents future peeling or leaks.
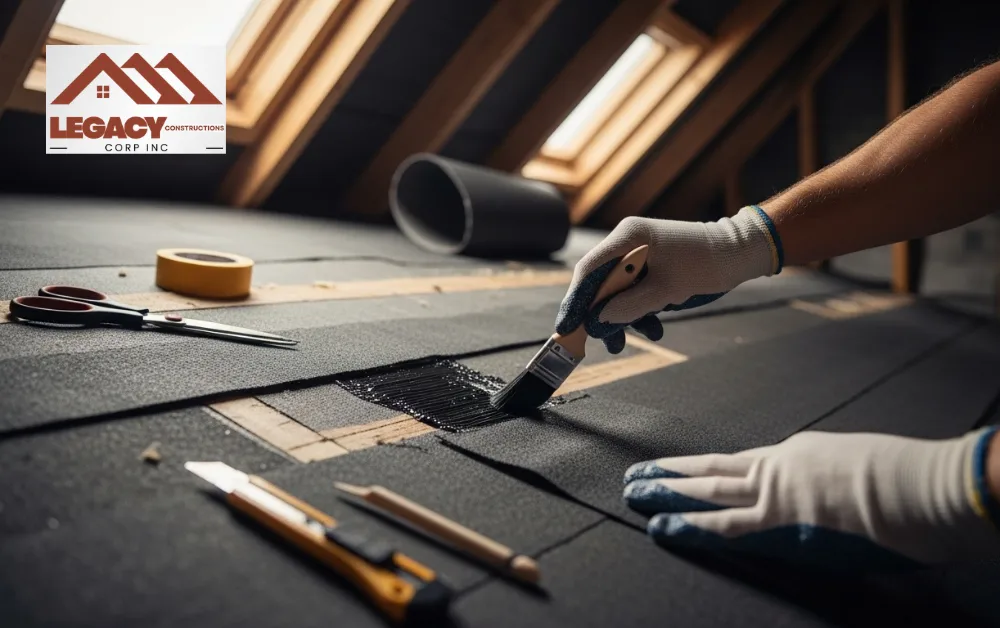
4. Apply Adhesive
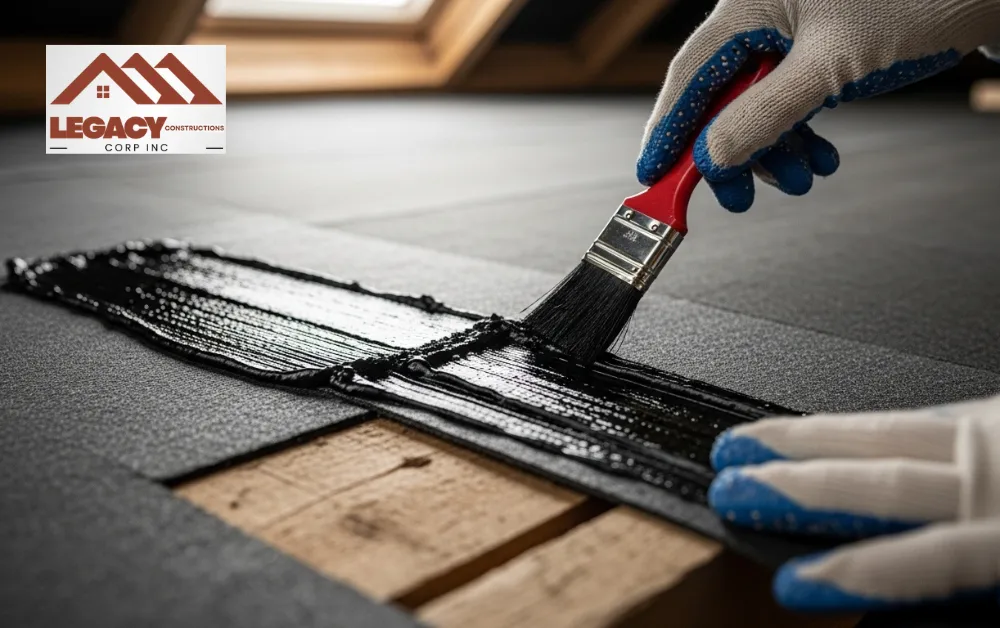
Brush or roll roofing adhesive over both the damaged area and the underside of your patch. Spread it evenly but avoid excessive dripping. Extend the adhesive slightly beyond the tear to form a complete waterproof barrier. This is a critical step in any roof membrane repair.
5. Position and Press the Patch
Carefully place the patch over the damaged felt. Press from one side to the other to avoid trapping air. Firmly press the entire surface with your hands (wear gloves), a roller, or a flat tool. Smooth edges prevent water from creeping underneath, which is vital for long-lasting felt roof repair.
6. Seal the Edges
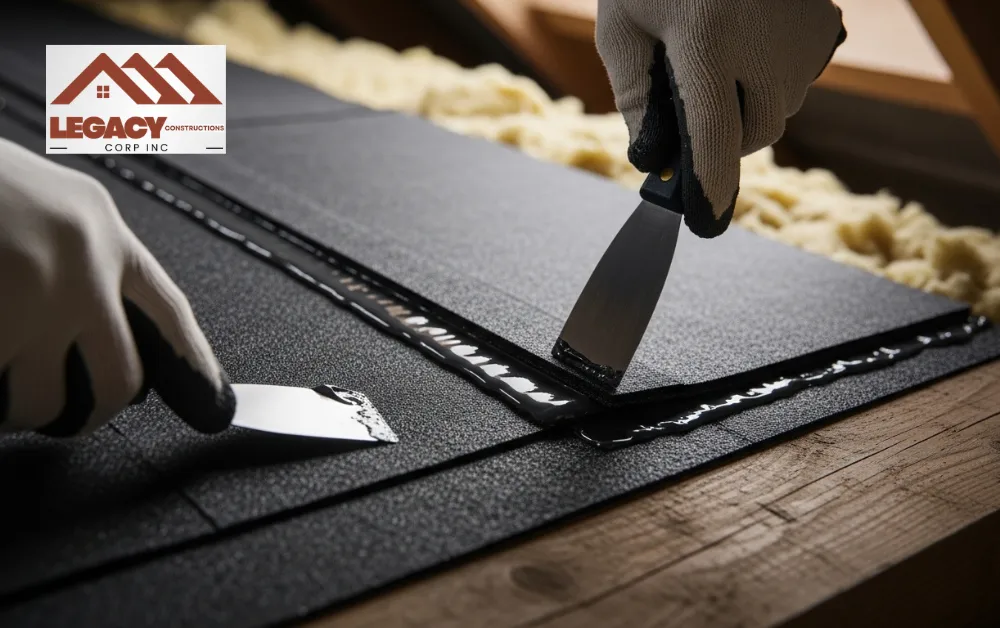
Add extra adhesive or roof sealant around all patch edges. Smooth it with a spatula or gloved finger for a neat finish. Proper edge sealing helps prevent water from seeping under the patch during heavy rain.
7. Let It Dry and Inspect
Follow the drying time recommended on your adhesive packaging, typically several hours. Once dry, inspect for any lifted edges or missed spots. During the next rainfall, monitor for leaks. Remember, repairing the roof from the inside is often a temporary solution, buying time until a full exterior repair can be completed.
Common Roof Felt Repair Mistakes to Avoid
Even small errors can ruin your felt roof repair. Being careful now saves you bigger problems later. Here are the most common mistakes homeowners make:
- Skipping cleaning: Dust, dirt, or cobwebs stop adhesive from sticking properly. Always clean the area first.
- Using a patch that’s too small: Make sure your patch extends well beyond the tear. This prevents water from sneaking under it.
- Not sealing edges: Unsealed edges let water in, which can undo your repair fast.
- Working on damp felt: Adhesive won’t bond to wet surfaces. Dry the area completely before starting.
- Rushing the drying process: Let the patch cure fully. Patience ensures a long-lasting roof felt repair from the inside.
Important: Indoor felt roof repairs are only a temporary fix. If the damage is severe, hire a professional roofing contractor. They can replace the felt from the outside, keeping your roof safe and waterproof. While the upfront cost is higher, it prevents far more expensive problems later.
When DIY Repairs Aren’t Enough
A small patch can fix minor tears, but some roof problems need more than a DIY approach. Trying to handle large or repeated leaks yourself can lead to bigger headaches later.
Watch for these warning signs:
- Extensive felt damage or rot
- Multiple weak spots across the roof felt
- Leaks that keep returning after patching
- Damage near roof joints, edges, or corners
If you notice any of these issues, it’s time to call in help. Turning to a trusted roofing company is the smart move. They can replace the damaged felt safely from the outside and ensure your roof stays fully waterproof. Professional repairs may cost more upfront, but they prevent far bigger, more expensive problems and give you peace of mind.
How to Prevent Future Roof Felt Damage
Taking care of your roof now can save you from costly repairs later. Small efforts go a long way in keeping your roof safe and waterproof.
Here are the key steps to protect your roof felt:
- Inspect your loft regularly: Check at least twice a year and after heavy storms. Look for damp spots, tears, or loose sections.
- Keep airflow clear: Make sure vents aren’t blocked. Proper ventilation prevents moisture buildup and condensation.
- Fix small tears immediately: Even tiny damage can grow over time. A quick patch prevents bigger leaks.
- Maintain gutters: Clear debris so water doesn’t back up under roofing layers.
Regular attention extends your roof’s life and keeps your home safe from water damage. A little care now prevents major repairs later.
Conclusion
Repairing your roof felt from inside the loft can stop small leaks from becoming bigger issues. By spotting damage early, using the right tools, and applying patches carefully, minor tears can be fixed safely. Indoor repairs save money and keep you protected when the weather makes roof access risky.
For larger problems or persistent leaks, it is best to call a professional. Regular maintenance, such as inspecting the loft, addressing small tears quickly, and keeping gutters clear, helps extend your roof’s lifespan and keeps your home safe. With proper care, your felt roof will remain strong, secure, and waterproof for years.
FAQs
How long does a roof felt patch last?
A patch from inside is usually a temporary fix. It can last from months to a few years, depending on the weather, roof condition, and the quality of the adhesive. For long-term protection, exterior repairs or full felt replacement may be needed.
What are common causes of felt roof leaks?
Leaks often result from ageing felt, storm damage, poor drainage, standing water, loose seams, or punctures from debris. Regular inspections and timely repairs can prevent minor damage from becoming severe.
How often should I inspect my loft for roof felt damage?
It’s best to check your loft at least twice a year, ideally in spring and autumn. Inspect after heavy rain, storms, or snow. Look for damp spots, leaks, or torn felt.
What type of adhesive is best for roof felt repair?
Bitumen-based adhesive or roofing glue works best. It bonds strongly and forms a waterproof seal. Make sure the surface is clean and dry before applying.